Gradients
codepen practice pagetypes of gradients
A gradient occurs where one color blends into another, and can be applied to fills or strokes.
SVGs support two types of gradients :
- linear (left) and
- radial (right)
Gradients are defined in the <defs> section, making them reusable.
Creating linear gradients
A linearGradient is a gradient that occurs along a straight line. The image below is an example of a horizontal linearGradient.
The <linearGradient /> element
The <linearGradient /> element is used to define a linear gradient in an SVG. It is defined within the <defs> section.
1
2
3
4
<defs>
    <linearGradient>
    </linearGradient>
</defs>
id
In order to use the gradient as a fill or stroke color, we have to be able to reference it by it's id
1
2
3
4
<defs>
    <linearGradient id="linear_gradient_horiz">
    </linearGradient>
</defs>
There's nothing to this gradient yet, but to apply it as a fill we'll use the fill attribute with the gradient's id:
fill="url(#linear_gradient_horiz)"
1
2
3
4
5
6
7
8
9
10
<defs>
    <linearGradient id="linear_gradient_horiz">
    </linearGradient>
</defs>
.
.
.
<rect x="0" y="0"
  width="500" height="500"
  fill="url(#linear_gradient_horiz)" />
stop colors
Now let's add the colors, which are defined in the <stop> elements that are children of the <linearGradient> element.
1
2
3
4
<linearGradient id="linear_gradient_horiz">
  <stop offset="0%" stop-color="red" />
  <stop offset="95%" stop-color="blue" />
</linearGradient>
You'll notice that the stop element has two attributes - offset and stop-color.
The offset is the position of the color in a range of 0-100%. So 0% would be at the very beginning and 100% would be at the end of the gradient.
The stop-color is the color at the offset position.
There's also a stop-opacity attribute not present here. It sets the opacity of the stop-color at the offset position. If omitted it defaults to 100%.
Here the offset position for blue has been moved to 50%.
1
2
3
4
<linearGradient id="lin-grad_50">
    <stop offset="0%" stop-color="red" />
    <stop offset="50%" stop-color="blue" />
</linearGradient>multiple stop colors
This gradient has three stop colors.
1
2
3
4
5
<linearGradient id="three_stops">
    <stop offset="00%" stop-color="red" />
    <stop offset="50%" stop-color="gold" />
    <stop offset="100%" stop-color="green" />
</linearGradient>
changing the gradient direction
You can change the direction of the gradient by defining a line using the x1, y1, x2, y2 attributes. x1, y1 defines the starting point of the gradient within the bounding box, while x2, y2 defines the endpoint of the gradient within the bounding box.
1
2
3
4
<linearGradient id="linear_gradient" x1="0%" y1="0%" x2="100%" y2="100%">
   <stop offset="0%" stop-color="red" />
   <stop offset="100%" stop-color="blue" />
</linearGradient>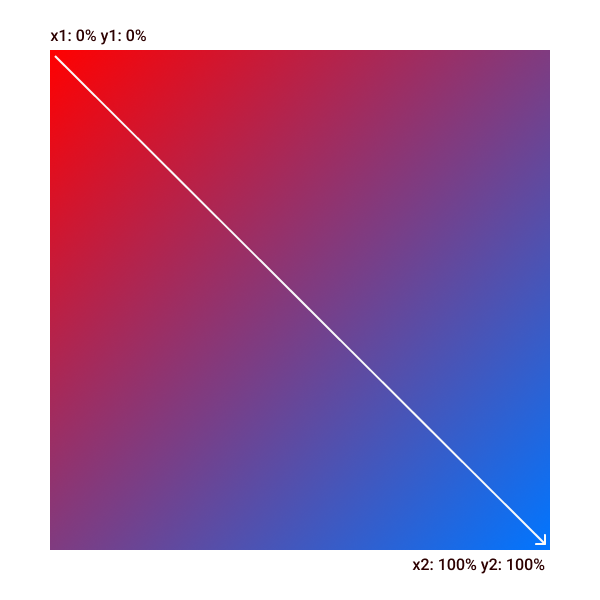
You can play around with the linear gradients we just discussed at the codepen below.
radialGradient
A radialGradient is a gradient that progresses outwards in a circular pattern from a start point. The basic setup is the same as that of a linearGradient: the radialGradient element has an id to identify and apply the gradient to an element fill, and the element contains two or more stop elements to define the stop-colors and their offset positions.
1
2
3
4
<radialGradient id="radial_gradient">
   <stop offset="0%" stop-color="red" />
   <stop offset="100%" stop-color="blue" />
</radialGradient>
Here the offset position of the first stop-color has been moved to 50%
1
2
3
4
<radialGradient id="radial_gradient">
   <stop offset="50%" stop-color="red" />
   <stop offset="100%" stop-color="blue" />
</radialGradient>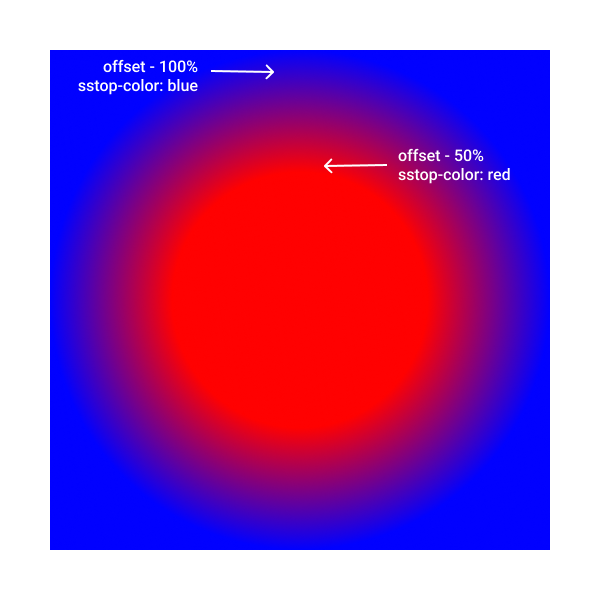
gradient orientation
You can change the orientation/direction of the radialGradient as well, using the following attributes:
fx, fy: The focal point, which defines the center of the circle where the radialGradient begins
cx, cy: The center point, which defines the center of the circle where the radialGradient ends
By default, both points are at the center of the bounding box
1
2
3
4
5
6
<radialGradient
    cx="50%" cy="50%" fx="50%" fy="50%"
    id="radial_gradient">
   <stop offset="0%" stop-color="red" />
   <stop offset="100%" stop-color="blue" />
</radialGradient>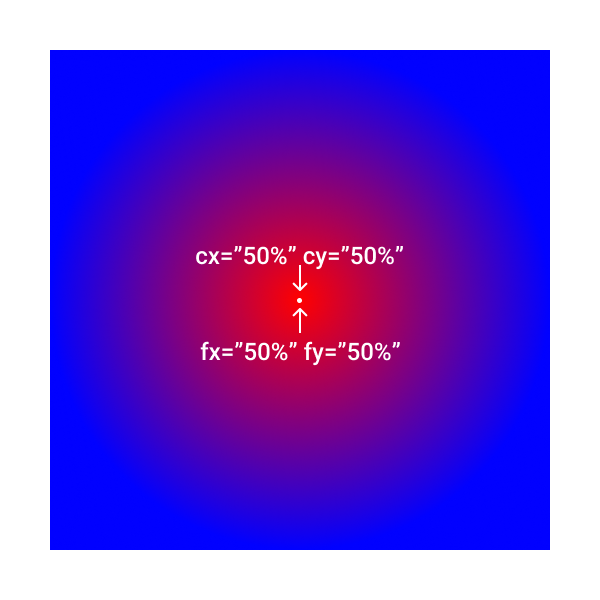
Lets move the focal point all the way to the left (fx="0%"). Notice how the gradient originates from the focal point
1
2
3
4
5
6
<radialGradient
    cx="50%" cy="50%" fx="0%" fy="50%"
    id="radial_gradient">
   <stop offset="0%" stop-color="red" />
   <stop offset="100%" stop-color="blue" />
</radialGradient>
One way to visualize the radial gradient is as a series of ever increasing circles transitioning from the inner “focal point” circle an outer circle with a center of cx, cy.
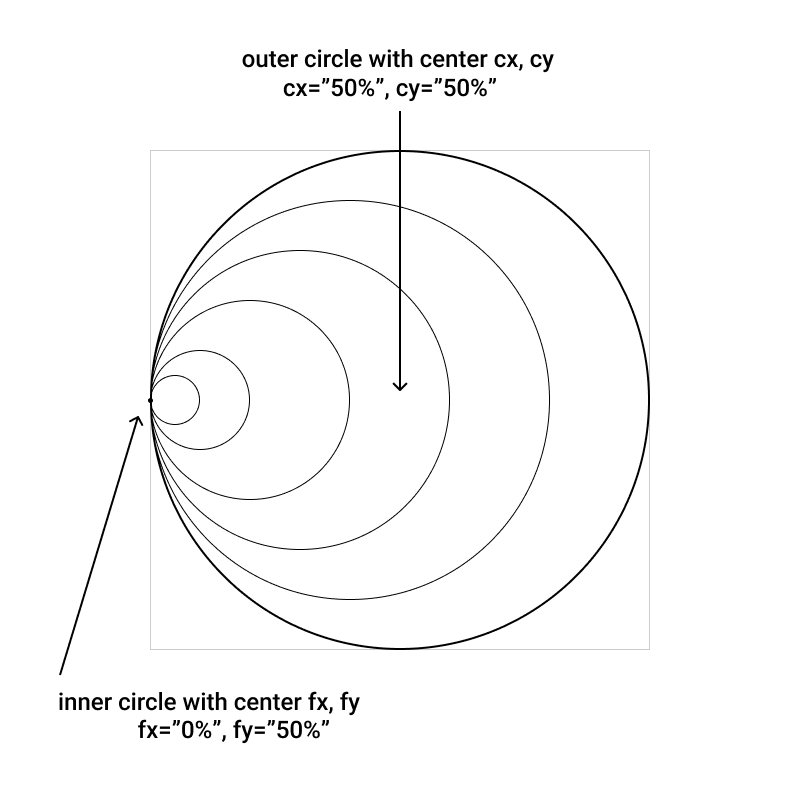
Now let's move the focal point back to the center, and move the center point to the right edge (cx="99%).
1
2
3
4
5
6
<radialGradient
    cx="99%" cy="50%" fx="50%" fy="50%"
    id="radial_gradient">
   <stop offset="0%" stop-color="red" />
   <stop offset="100%" stop-color="blue" />
</radialGradient>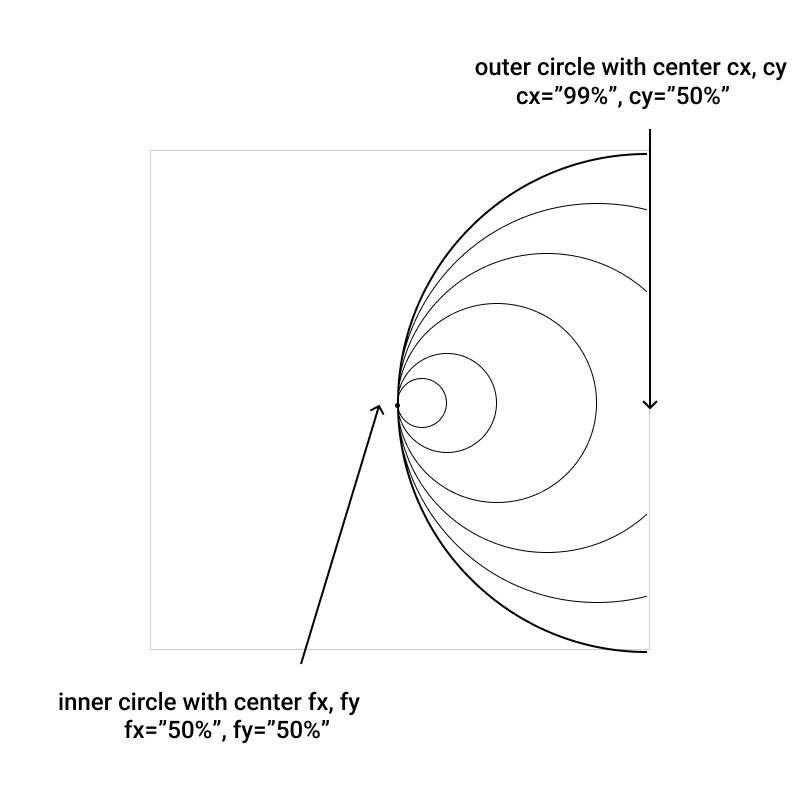
You can also manipulate the gradient by changing the radius of the outer circle (which marks the outer edge of the gradient). By default it is 50% width or height. So for a square with a width of 100, the r is 50. You can set the value of the r to whatever you want - even values greater than 100%
1
2
3
4
5
6
<radialGradient
    r="50%"
    id="radial_gradient">
   <stop offset="0%" stop-color="red" />
   <stop offset="100%" stop-color="blue" />
</radialGradient>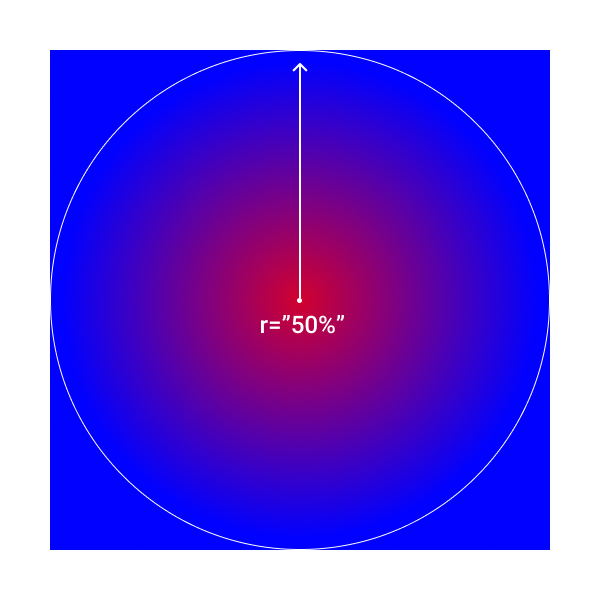
Now let's see what the gradient looks like when we set the radius to 20%:
1
2
3
4
5
6
<radialGradient
    r="20%"
    id="radial_gradient">
   <stop offset="0%" stop-color="red" />
   <stop offset="100%" stop-color="blue" />
</radialGradient>
You can set the value of the r to whatever you want - even values greater than 100%
1
2
3
4
5
6
<radialGradient
    r="120%"
    id="radial_gradient">
   <stop offset="0%" stop-color="red" />
   <stop offset="100%" stop-color="blue" />
</radialGradient>
You can also change the radius of the focal point circle. The radialGradient start point (stop offset=”0%”) is the edge of the focal circle. By default, the radius is 0%
1
2
3
4
5
6
7
<radialGradient
    r="50%"
    fr="0%"
    id="radial_gradient">
   <stop offset="0%" stop-color="red" />
   <stop offset="100%" stop-color="blue" />
</radialGradient>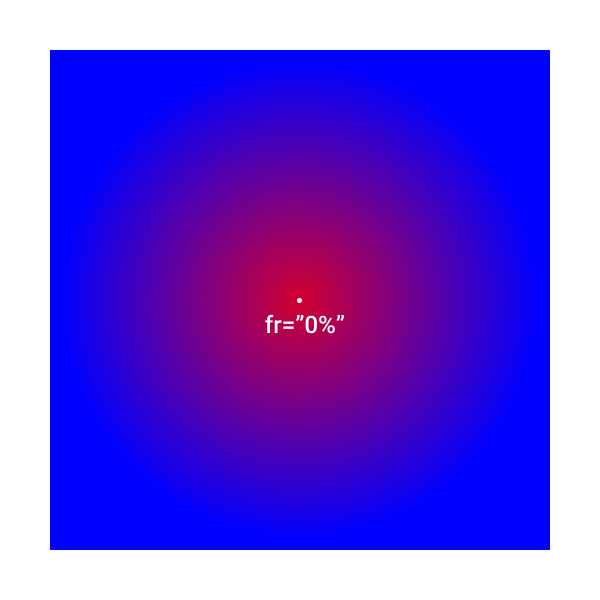
In this example below we’ve changed the radius of the focal point circle to 25%. So now, instead of the stop offset=”0%” starting at the center of the circle, it starts at the edge of the focal circle
1
2
3
4
5
6
7
<radialGradient
    r="50%"
    fr="25%"
    id="radial_gradient">
   <stop offset="0%" stop-color="red" />
   <stop offset="100%" stop-color="blue" />
</radialGradient>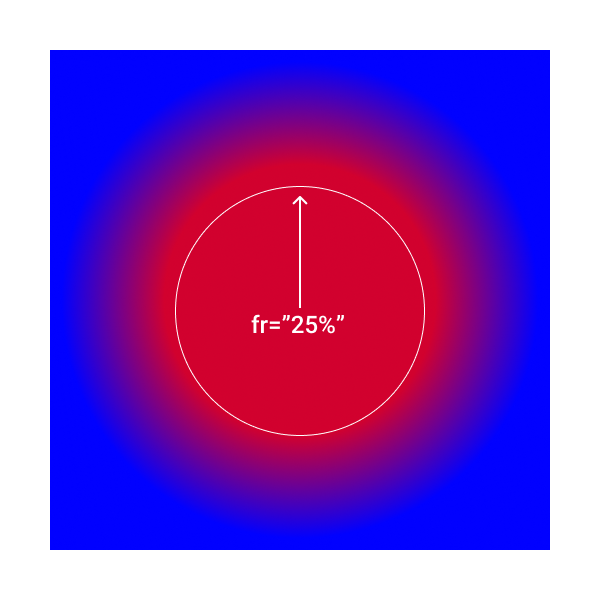
You can see examples of all the radial gradients we discussed in the codepen below.
using a gradient as a fill
Once you've defined the gradeint, you can use it as a fill by simply passing in the gradient's id:
fill="url(#lin-grad_0)"
1
2
3
4
5
6
7
8
9
10
11
<svg width="500" height="500" viewBox="0 0 500 500">
    <defs>
        <linearGradient id="lin-grad_0">
            <stop offset="0%" stop-color="red" />
            <stop offset="100%" stop-color="blue" />
        </linearGradient>
    </defs>

    <circle cx="250" cy="250" r="200" fill="url(#lin-grad_0)" />

</svg>
using a gradient as a stroke
You can also use the gradient as a stroke:
stroke="url(#lin-grad_0)"
1
2
3
4
5
6
7
8
9
10
11
<svg width="500" height="500" viewBox="0 0 500 500">
    <defs>
        <linearGradient id="lin-grad_0">
            <stop offset="0%" stop-color="red" />
            <stop offset="100%" stop-color="blue" />
        </linearGradient>
    </defs>

    <circle cx="250" cy="250" r="200" stroke="url(#lin-grad_0)"  stroke-width="15" fill="none" />

</svg>